Auto switch to A2DP bluetooth device when connected in Ubuntu

Add to /etc/pulse/default.pa to automatically switch pulseaudio sink to Bluez:

 .ifexists module-bluetooth-discover.so
 load-module module-bluetooth-discover
 load-module module-switch-on-connect  # Add this
 .endif

Modify /etc/bluetooth/audio.conf to auto select A2DP profile (instead of HSP/HFP):

 [General]
 Disable=Headset # Add this

Apply changes:

sudo pulseaudio -k # Restarts pulseaudio
sudo restart --system bluetooth # Restarts BT

IMAP/SMTP via HTTPS Proxy

In some places internet access is provided via proxy. Some proxies block imap and smtp and allow only ports 80 and 443. If your email client doesn’t have proxy configuration (like my beloved Mutt), then you need to forward imap and smtp by hand. If the proxy you are behind supports https this means you can bypass it via https connect method.

To demonstrate that I’ll install Proxytunnel on my Ubuntu 14.04. After that I am creating 2 upstart scripts that launch proxy-tunnel daemons from proxy to imap/smtp (in this example to gmail’s servers). The daemons are started on system’s boot and are listening for imap connections on localhost:993 and smtp on localhost:993. For simplicity I’m adding my mail servers to hosts file, without that I would need to reconfigure my mail client to use localhost instead of *.gmail.com.

sudo apt-get install proxytunnel
sudo touch /etc/init/tunnel-imap.conf /etc/init/tunnel-smtp.conf
sudo chmod 644 /etc/init/tunnel-imap.conf /etc/init/tunnel-smtp.conf

/etc/init/tunnel-imap.conf:

# proxy daemon for Gmail

description     "proxy daemon for Gmail imap"

start on runlevel [2345]

expect fork
respawn
respawn limit 10 5

exec    /usr/bin/proxytunnel -p proxy.com:80 -d imap.gmail.com:993 -a 993

/etc/init/tunnel-smtp.conf:

# proxy daemon for Gmail

description     "proxy daemon for Gmail smtp"

start on runlevel [2345]

expect fork
respawn
respawn limit 10 5

exec    /usr/bin/proxytunnel -p proxy.com:80 -d smtp.gmail.com:587 -a 587

add to /etc/hosts:

127.0.1.1   imap.gmail.com
127.0.1.1   smtp.gmail.com

Reboot

Tip 1: if you are an Upstart guru, you can make 1 upstart script instead of 2 🙂
Tip 2: one can use iptables instead of hosts

# iptables -t nat -A OUTPUT -d smtp.gmail.com -j DNAT --to-destination 127.0.1.1

Tip 3: there is a Python script that does the same job (didn’t test it)

Streaming audio from Ubuntu Linux to a DLNA player without Rygel

Recently, I became the proud owner of Onkyo TX-NR515 receiver. This device is DLNA MediaRenderer as upnp-inspector says. The A/V receiver is from the 2012 devices family (TX-NR414/TX-NR515/TX-NR616).

Streaming the sound from PC to my DLNA device over wlan was a tough task, but I managed to solve it the way I’ll describe below. The main idea is to pass the alsa/pulseaudio output stream over LAN to DLNA device. There are 2 ways of doing it: with DLNA server or without.

Continue reading

Extract radio streams with Wireshark

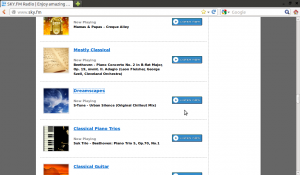
  1. Open the page of your favourite radio station and prepare to launch radio player.
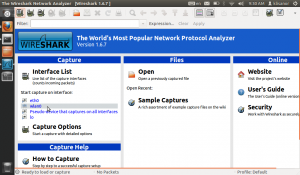
  2. Open Wireshark and launch it on your current interface.
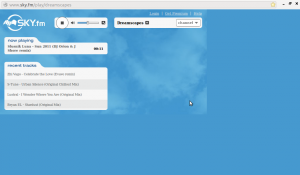
  3. Start the radio player, wait a little (10 sec): let wireshark collect some packets.
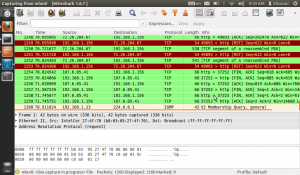
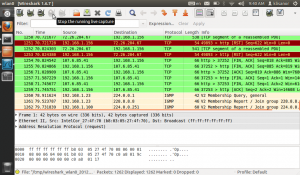
  4. Stop the wireshark running live capture (you can close the radio player now)
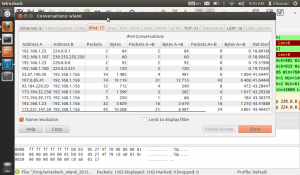
  5. In wireshark open Statistics->Conversations. In conversations open IPv4 tab.
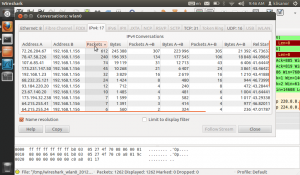
  6. Sort the conversations by packets
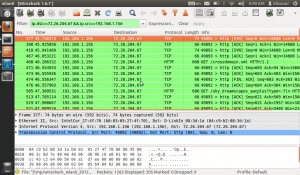
  7. Right click the conversation with maximum number of Packets and Apply a filter->Selected-> ‘A<-B'. Close the conversations window.
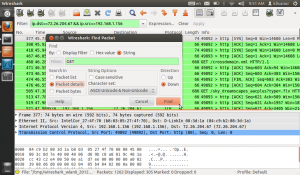
  8. Open find packet dialog (CTRL+F), select String radio button, Search in: Packet details, find string “GET”.
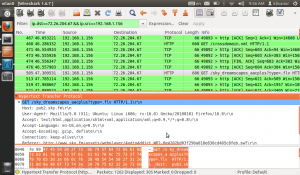
  9. The second packet with GET was the one I needed
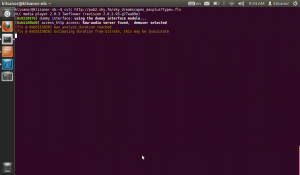
  10. You’ll see the host and path, concat 2 strings and test the stream in your favourite audio player
  11. Share the stream link with your friends and on Wikipedia, enjoy!

P.S. You can also use the ‘easy’ way: install Windows, download URL Snooper, extract stream. Don’t forget to donate to DonationCoder.

OSQA: Ubuntu with Apache and MySQL

About This Installation Guide

Before you begin OSQA installation, you first need to get the source code from subversion. You can receive instruction on how to do this from our Download OSQA page . This guide covers the installation of OSQA on the Ubuntu operating system using a MySQL database. If you’ve achieved a successful installation on Windows, Mac, or any other OS, we are interested in adding your installation methods to our upcoming guides for those systems. To successfully install OSQA, simply perform the instructions in each section as you scroll down the page. Continue reading

OSQA install experience

OSQA is an opensource Q/A engine. In this article I’ll describe the way I installed it on my VPS.

I like Debian/Ubuntu OS. Debian lacks new packages, that’s why I chose Ubuntu 12.04 LTS.

Act 1. Lighttpd

I had Lighttpd installed on my machine, so firstly I tried to install OSQA on Lighttpd. Googling around I found that running OSQA in fcgi mode is not OK (when you have a VPS). WSGI is the right way. Unfortunately, Lighttpd’s WSGI is very unstable, experimental and unsupported. That’s why I decided to move to nginx.

Act 2. nginx

Django projects are great with pure WSGI servers. So I decided to install nginx with WSGI server (uWSGI, GUnicorn, etc.). Spending 3 days, writing LOTS of site blocks, tuning nginx, messing around with various WSGI servers, I finally switched to Apache.

Act 3. Apache

My Apache/Ubuntu way was as described in article on meta.osqa.com. After doing the steps I received 500 errors as well as this:

Middleware module "django.middleware.csrf" does not 
define a "CsrfResponseMiddleware" class

OSQA is not compatible with Django 1.4.0, but works OK in 1.3.1. Check your version:

python
>>> import django
>>> django.VERSION

If necessary install 1.3.1:

sudo easy_install django==1.3.1

P.S.

In my spare time I’ll continue playing with nginx + uWSGI (or gunicorn), I think it’s the best way of running OSQA.

Скачивание с RuTube в Ubuntu Linux

Ubuntu Linux:

sudo apt-get install rtmpdump

Rutube отдаёт ссылки на видеоролики 4-мя способами (по состоянию на 8 ноября 2013 г.):

  1. Нешифрованное видео по протоколу RTMP. Для закачки используется rtmpdump (версия не ниже 2.4).
  2. Шифрованное видео по RTMP. Хоть и скачается rtmpdump’ом, но воспроизвести его не удастся. Решение для этого типа ссылок не найдено.
  3. Нешифрованное видео по технологии HTTP Dynamic Streaming. Для закачки используется скрипт AdobeHDS.php
  4. Нешифрованное видео методом HTTP Live Streaming. Для закачки используется VLC/ffmpeg.

Сначала нужно определить, какой тип отдачи используется для требуемого видеоролика, на момент обновления статьи чаще всего это способы 3 и 4 (как минимум, для российских пользователей).

Для этого берём любую ссылку на нужное видео с его полным или предназначенным для встраивания идентификатором, это может быть ссылка вида:

  1. http://rutube.ru/video/51c001891c1147fa53787c8496c0d8bf/
  2. http://rutube.ru/video/embed/6641938
  3. http://rutube.ru/[accounts/login/?next=/]video/private/2cc0885902cac3c8f9f88849e115db15/?p=lwTcQ6Z0PUTg3AB7lDvGqg

Для ссылки под номером 3 важно не терять параметр “p”, стоящий в конце.

Открываем файл с информацией о видео http://rutube.ru/api/play/trackinfo/<VIDEO_ID>/?format=xml[&p=blablabla]:

http://rutube.ru/video/51c001891c1147fa53787c8496c0d8bf/
=> http://rutube.ru/api/play/trackinfo/51c001891c1147fa53787c8496c0d8bf/?format=xml
http://rutube.ru/video/embed/6641938
=> http://rutube.ru/api/play/trackinfo/6641938/?format=xml
http://rutube.ru/[accounts/login/?next=/]video/private/2cc0885902cac3c8f9f88849e115db15/?p=lwTcQ6Z0PUTg3AB7lDvGqg
=> http://rutube.ru/api/play/trackinfo/2cc0885902cac3c8f9f88849e115db15/?format=xml&p=lwTcQ6Z0PUTg3AB7lDvGqg

В этом файле нужны адреса из тега <videoBalancer>:
<default>http://bl.rutube.ru/5bc45bc80ad9f9597a8e1de3e0cf69f6.f4m — внутри этого файла будут ссылки для закачки по RTMP/HDS.
<m3u8>http://bl.rutube.ru/5bc45bc80ad9f9597a8e1de3e0cf69f6.m3u8 — для HLS.

RTMP/HDS

<default>http://bl.rutube.ru/5bc45bc80ad9f9597a8e1de3e0cf69f6.f4m
Это файл-манифест. Открыв его, смотрим на теги <baseURL> и <media>. Определяем тип отдачи по их содержимому:

  • RTMP, если baseURL == rtmp://video-N-N.rutube.ru/bla-bla-bla, а атрибут url тега media содержит расширение .mp4 в тексте ссылки.
  • Шифрованное видео по RTMP, если тот же атрибут url содержит расширение .f4f. Скачанное видео не воспроизводится.
  • Нешифрованное видео по HDS, если baseURL == http://video-N-N.rutube.ru, тег(и) media указывает на манифест (ссылка с расширением .f4m) либо сразу на mp4-файл.

Определившись со способом отдачи, приступаем к закачке.

RTMP
Тег <baseURL> содержит имя хоста, порт и переменную “app”. Атрибут url тега <media> содержит путь к потоку (playpath):
rtmp://video-N-N.rutube.ru(:1935)/<app>/mp4:volNN/movies/.*
|____________host___________|__app__|_____playpath____|

где переменная app может принимать следующие значения:

  1. vod/
  2. rutube/
  3. rutube_vod_[0-9]/
  4. rutube_vod_[0-9]/_definst_/

Из параметров, предлагаемых дампером (rtmpdump –help), нам нужны следующие:

--rtmp           URL (напр. rtmp://host[:port]/)
--app            Переменная app.
--playpath       Перезаписывает playpath, указанный в --rtmp
--swfUrl         Ссылка на swf-плеер.
--flv            Название конечного FLV-файла.
--live           Для rtmp-ссылок, переменная app которых равна "vod/".

Примеры закачки ссылок:
rtmp://video-1-12.rutube.ru:1935/rutube_vod_2/_definst_/mp4:vol12/movies/b5/e0/b5e08ad46a65d700dd0da2f7b40e2fc0.mp4?e=1288635285&s=740fa844fc6687ac03681a0eb72d003e

sh/cmd:

rtmpdump --rtmp "rtmp://video-1-12.rutube.ru:1935/"
 --app "rutube_vod_2/_definst_/"
 --swfUrl "http://rutube.ru/player.swf"
 --playpath "mp4:vol12/movies/b5/e0/b5e08ad46a65d700dd0da2f7b40e2fc0.mp4?e=1288635285&s=740fa844fc6687ac03681a0eb72d003e"
 --flv "output_video.flv"

rtmp://video-102-1.rutube.ru:1935/vod/mp4:rutube/vol41/movies/a2/05/a205ff4b2073c18522253585224f7a7c.mp4?e=1287342905&s=813f44d26fe97cd7ef670cb8d44e36e2

sh/cmd:

rtmpdump --rtmp "rtmp://video-1-12.rutube.ru:1935/"
 --app "vod/"
 --swfUrl "http://rutube.ru/player.swf"
 --playpath "mp4:rutube/vol41/movies/a2/05/a205ff4b2073c18522253585224f7a7c.mp4?e=128734&s=813f44d26fe97cd7ef670cb8d4"
 --flv "output_video.flv"
 --live

Не забудьте про параметр –live, используемый при переменной app равной “vod/”. Иначе видео будет качаться в размере, в два-три раза превышающий указанный на сайте. Также –swfUrl, он должен быть равен адресу флеш-плеера: “http://rutube.ru/player.swf”.

HDS
С HDS-ссылками проще, достаточно ссылки на f4m-файл:

sh/cmd:

php.exe AdobeHDS.php --manifest "http://bl.rutube.ru/5bc45bc80ad9f9597a8e1de3e0cf69f6.f4m"
 --outfile "output_video.mp4"

HLS

<m3u8>http://bl.rutube.ru/5bc45bc80ad9f9597a8e1de3e0cf69f6.m3u8

Для закачки можно использовать ffmpeg:

sh/cmd:

ffmpeg -i "http://bl.rutube.ru/5bc45bc80ad9f9597a8e1de3e0cf69f6.m3u8" video_out.ts


Credits: tradiz.org