Surfing the web I found a nice collection of OpenCV installation scripts for Linux distros. Unfortunately it did not have a script for latest 2.4.3 on Ubuntu. As a result I forked the repo and added it. Have a look:
https://github.com/DmitrySandalov/Install-OpenCV
Category Archives: unsorted
Extract radio streams with Wireshark
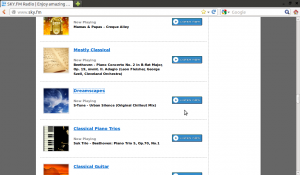
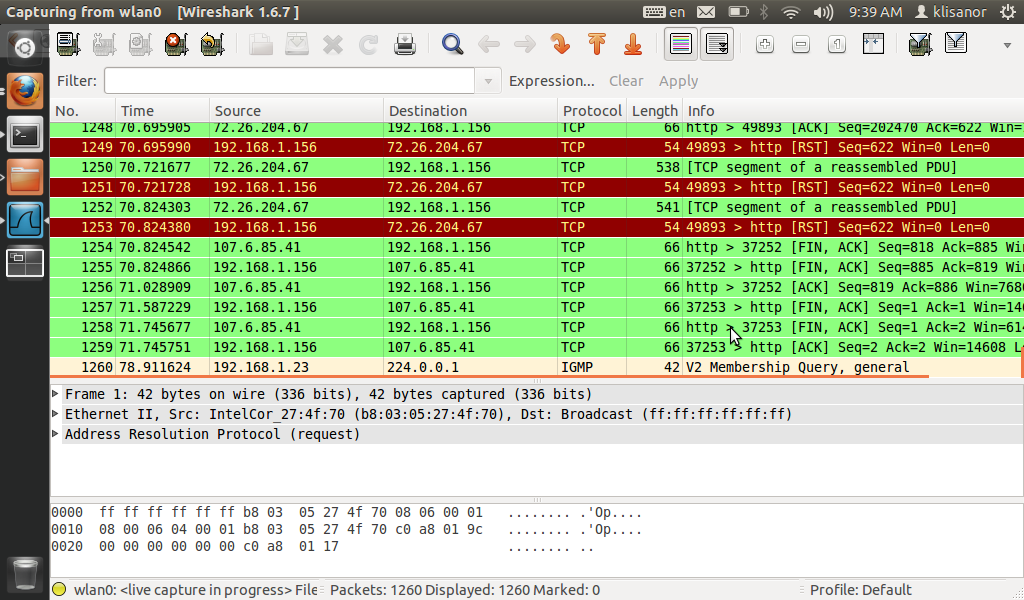
- Open the page of your favourite radio station and prepare to launch radio player.
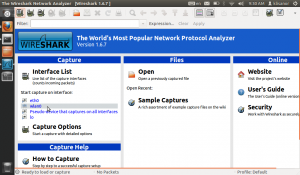
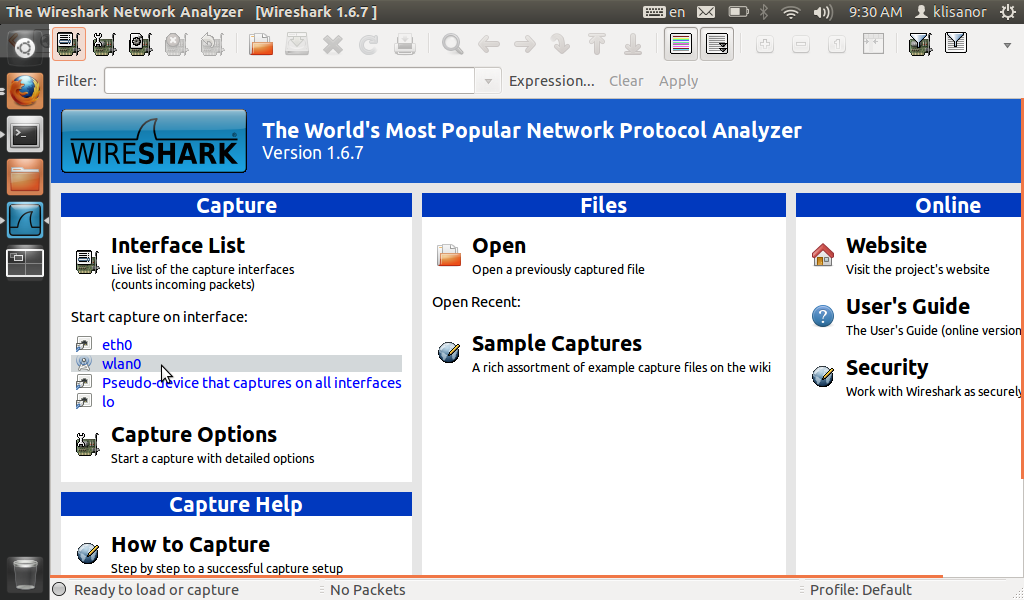
- Open Wireshark and launch it on your current interface.
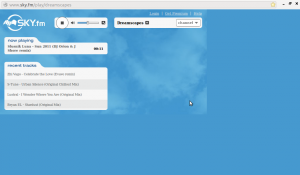
- Start the radio player, wait a little (10 sec): let wireshark collect some packets.
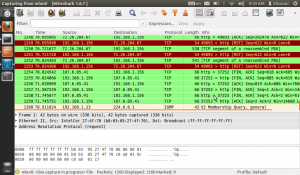
- Stop the wireshark running live capture (you can close the radio player now)
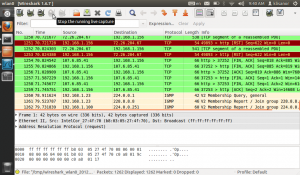
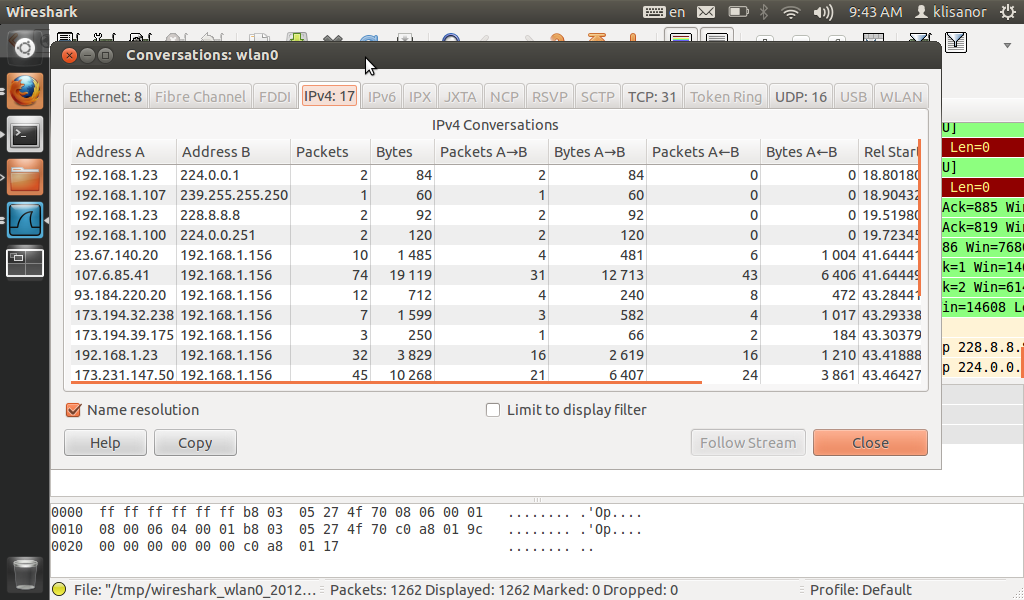
- In wireshark open Statistics->Conversations. In conversations open IPv4 tab.
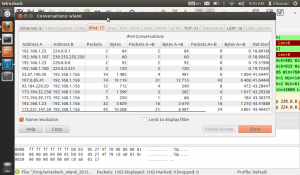
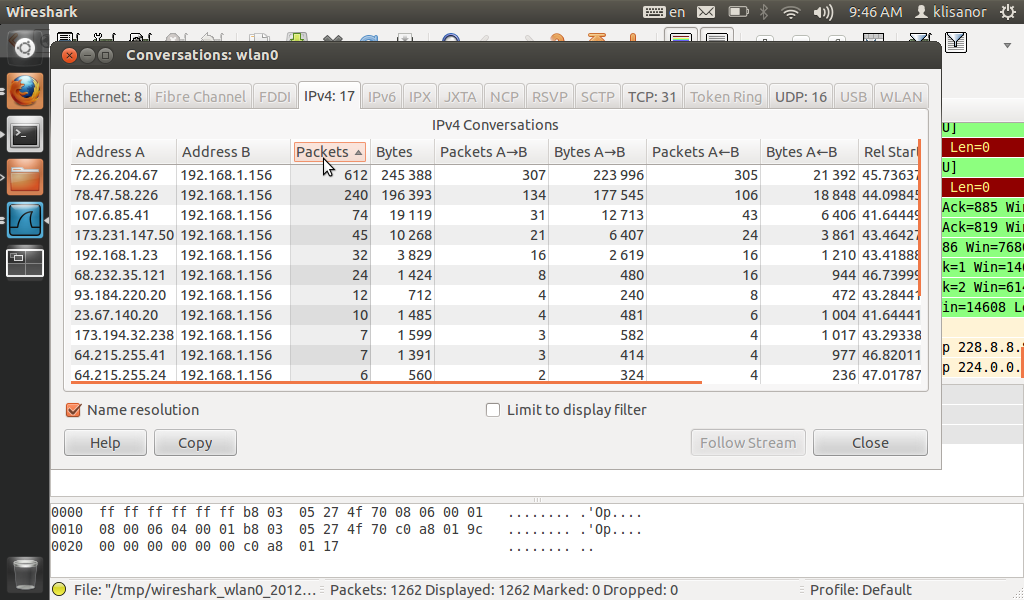
- Sort the conversations by packets
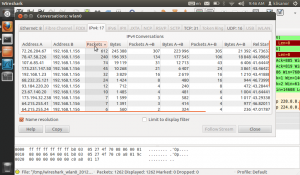
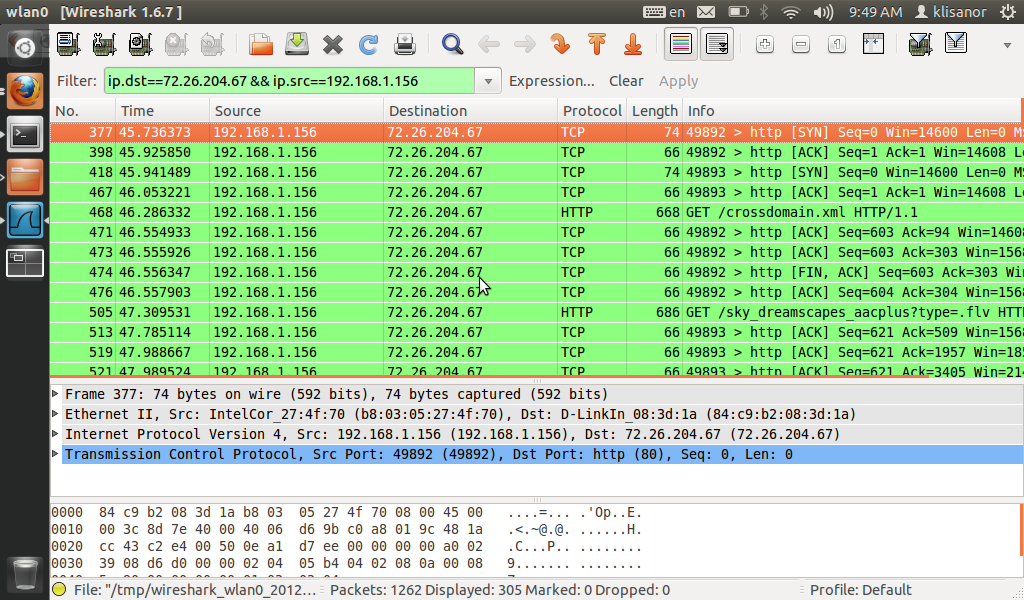
- Right click the conversation with maximum number of Packets and Apply a filter->Selected-> ‘A<-B'. Close the conversations window.
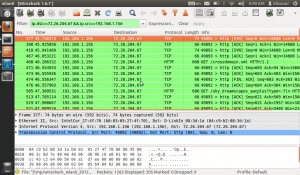
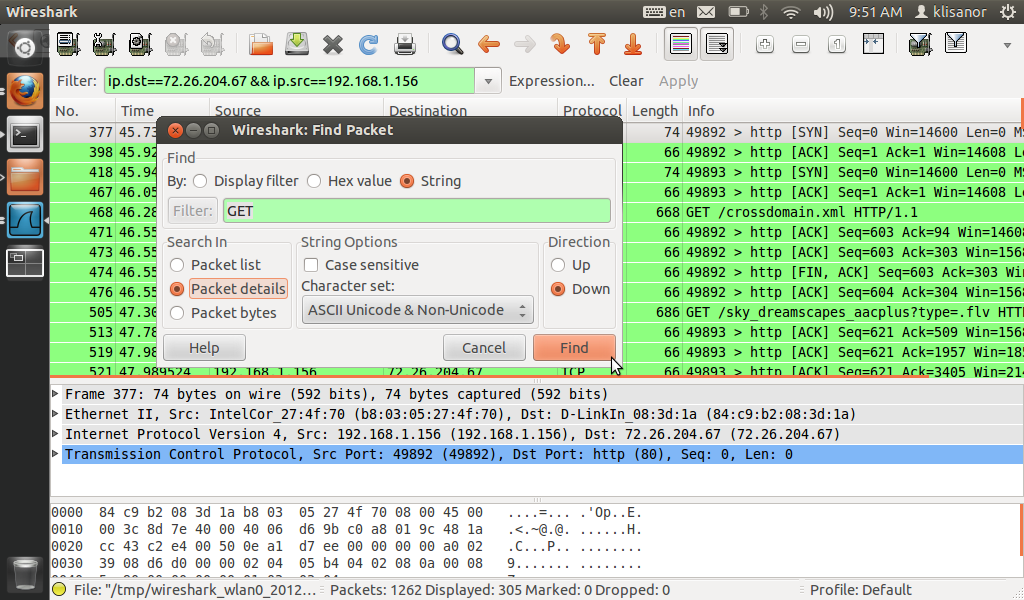
- Open find packet dialog (CTRL+F), select String radio button, Search in: Packet details, find string “GET”.
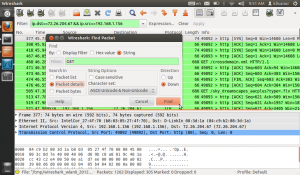
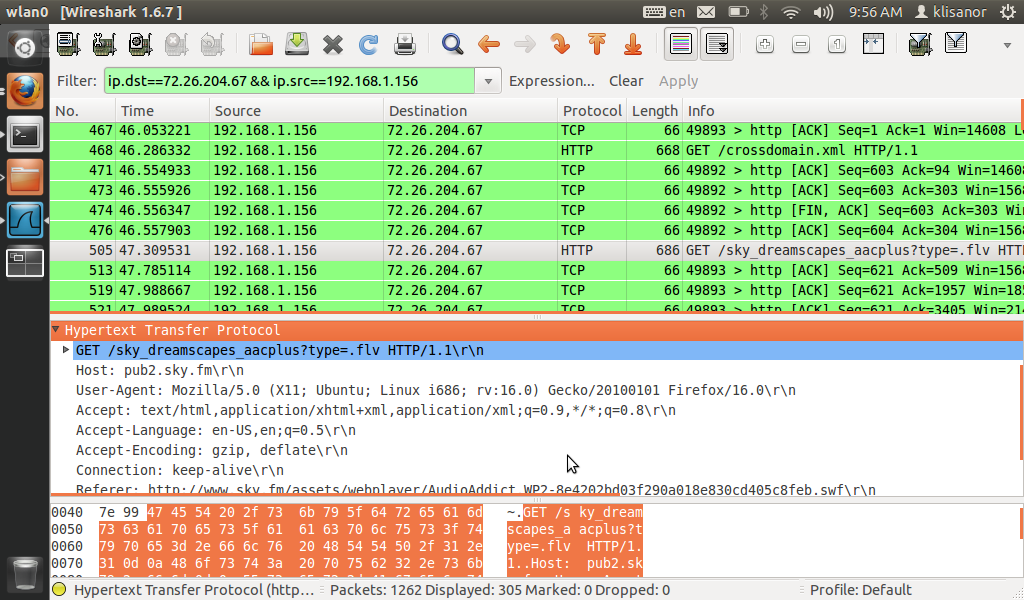
- The second packet with GET was the one I needed
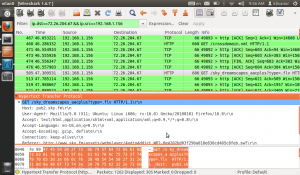
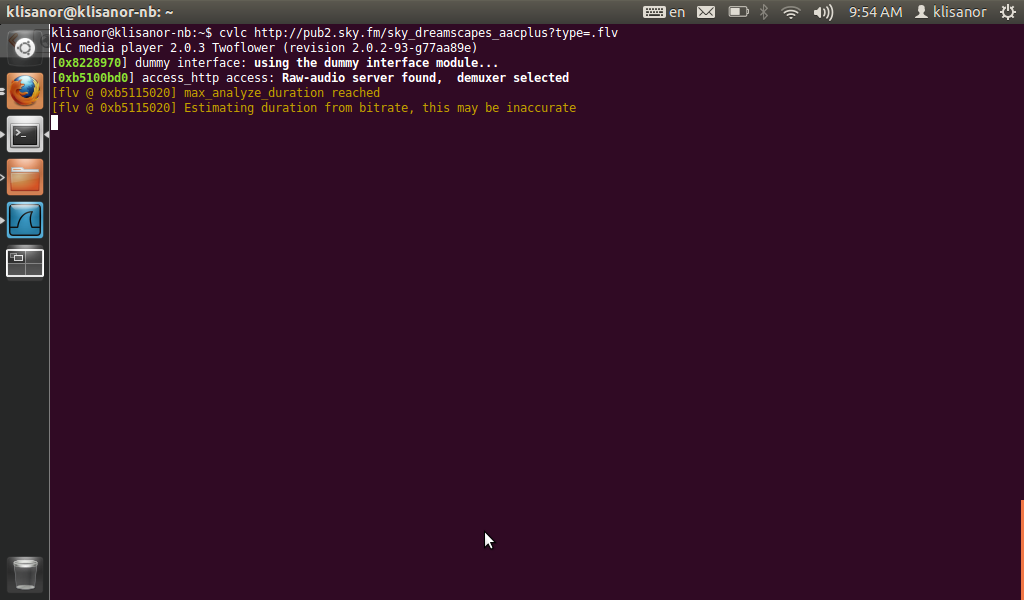
- You’ll see the host and path, concat 2 strings and test the stream in your favourite audio player
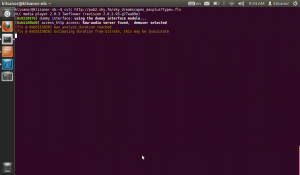
- Share the stream link with your friends and on Wikipedia, enjoy!



P.S. You can also use the ‘easy’ way: install Windows, download URL Snooper, extract stream. Don’t forget to donate to DonationCoder.
Купить подарочную карточку Spotify (redeem code, gift code)

В свете некоторых обстоятельств решил перейти с Last.fm на Spotify:
- Last.fm постоянно ухудшает жизнь тех, кто легально проплачивает сервис, “закручивает гайки” (что, в принципе, решаемо на Linux, аналогично на Windows и другие OS),
- Не разрешает слушать музыку через официальное приложение на Android в “плохих” странах (решаемо через CoboltFM, KLastFM
- Из-за ухудшения политики доступа к сервису через мобильные и “entertainment” устройства
- А также по причине покупки A/V ресивера Onkyo TX-NR515 (который, к слову, в Финляндии стоит на 10 тыс. руб. дешевле – об этом как-нибудь в другой раз расскажу)

Уж если и слушать на Hi-Fi ресивере качественный звук, то уж точно не Last.fm. Spotify – отличный музыкальный сервис, качество музыкальных произведений хоть и не lossless, но всё же 320 kbit/s (с ужасом вспоминаю время, когда слушал музыку вконтакте). Для Premium пользователей Spotify предлагает синхронизацию с мобильными устройствами с последующим “оффлайн” воспроизведением синхронизированных треков. Были небольшие трудности с регистрацией, но решилось с помощью VPN/Proxy/SSH туннелей.
Оплатить сервис в странах, не относящихся к территории Spotify достаточно сложно. Лично я решил эту проблему через свой европейский PayPal. Оплату также можно провести с помощью подарочных карт (Redeem card, Gift card). На момент написания поста друзей, кто мог бы поделиться такой карточкой не было.
Клиента под Android можно скачать из Amazon Store. Для этого надо поставить сам store: ссылка, в нём через поиск найти Spotify и установить.
UPD: для владельцев русских карт существует ещё одна лазейка. На этапе оплаты выбираете страну Литва и оплачиваете покупку как обычно. Стоимость в данном случае порядка 7€/месяц.
UPD2: С покупкой карт больше не помогаю. Те лазейки, которыми я пользовался закрыли. В последнее время пользуюсь Spotify Free и MPD. Актуальную информацию по оплате можно найти на 4pda.
Включить русскую Википедию во время забастовки

Инструкция по получению доступа к Wikipedia для тех, кто уже поддержал Wiki, рассказал об этом всем своим друзьям, написал депутату от своего участка, а также сделал донейт.
Способ №1
Для доступа к Wikipedia во время забастовки воспользуйтесь её мобильной версией:
http://ru.m.wikipedia.org
Способ №2
С помощью JavaScript:
Откройте консоль разработчика в Вашем браузере.
- Для Firefox: Firefox->Web Developer->Web Console (подробнее тут)
- Для Chrome: Tools->Developer tools->Web Console (подробнее тут)
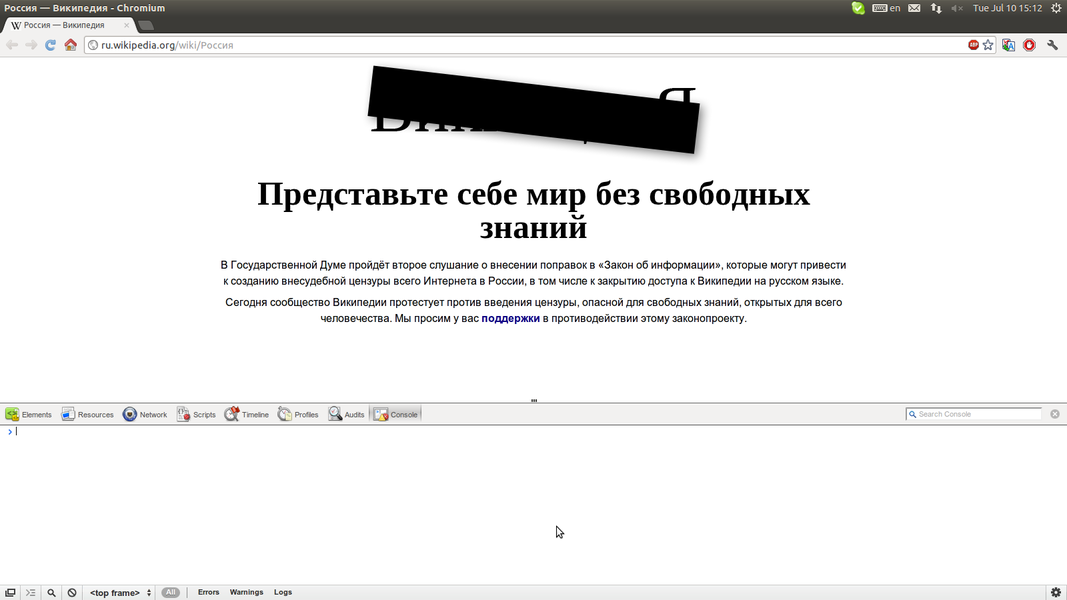
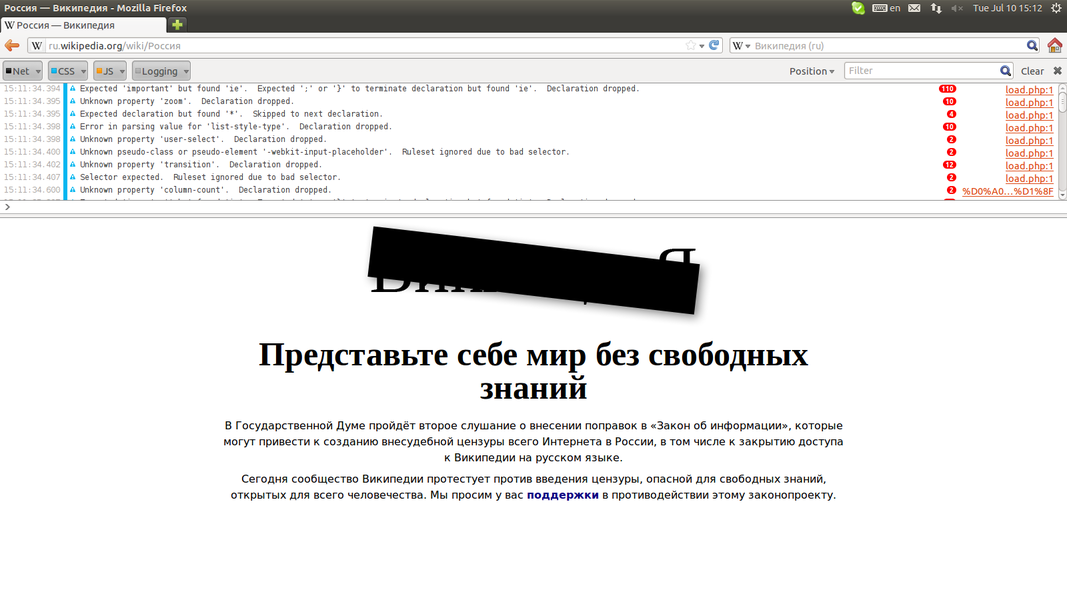
В консоли выполните:
(function(){
 document.getElementById("mw-page-base").style.display="block";
 document.getElementById("mw-head-base").style.display="block";
 document.getElementById("bodyContent").style.display="block";
 document.getElementById("mw-head").style.display="block";
 document.getElementById("mw-panel").style.display="block";
 document.getElementById("footer").style.display="block";
 document.getElementById("siteNotice").style.display="none";
})()
Способ №3
Кэш поисковой системы (работает в Яндекс, Google)
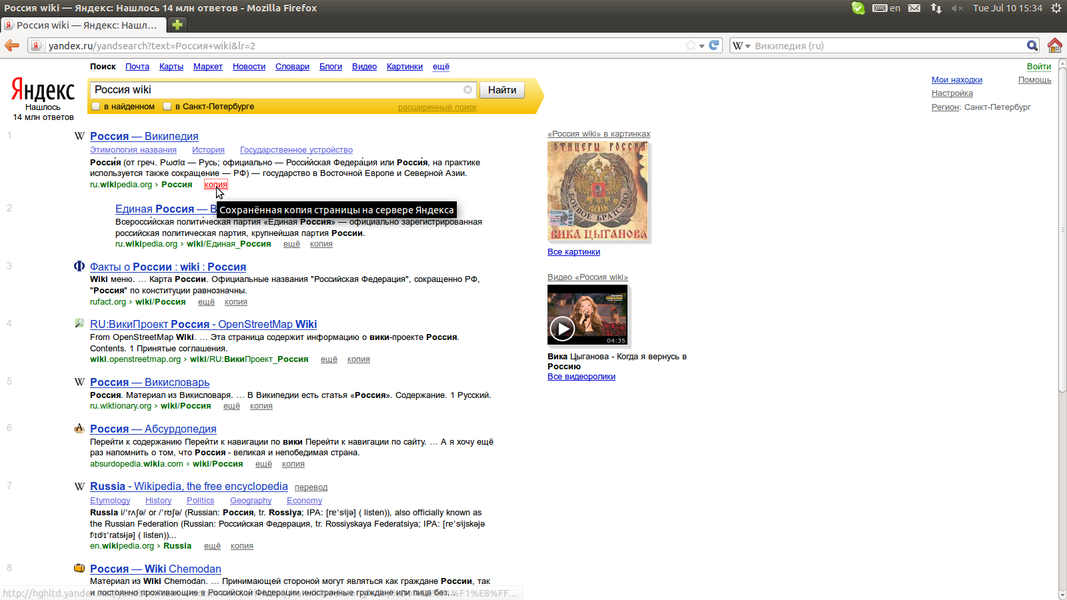
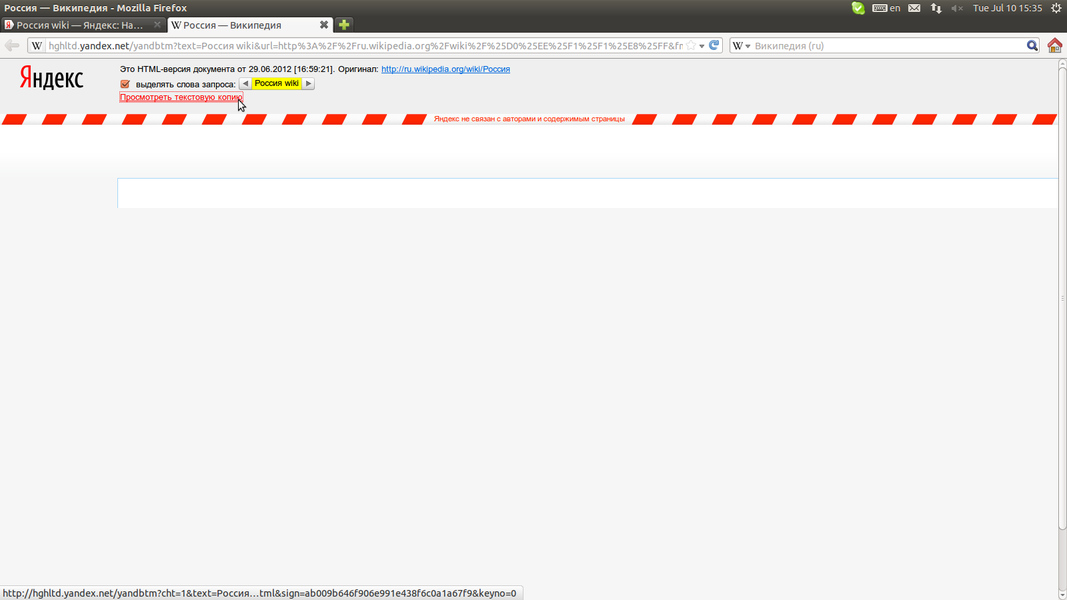
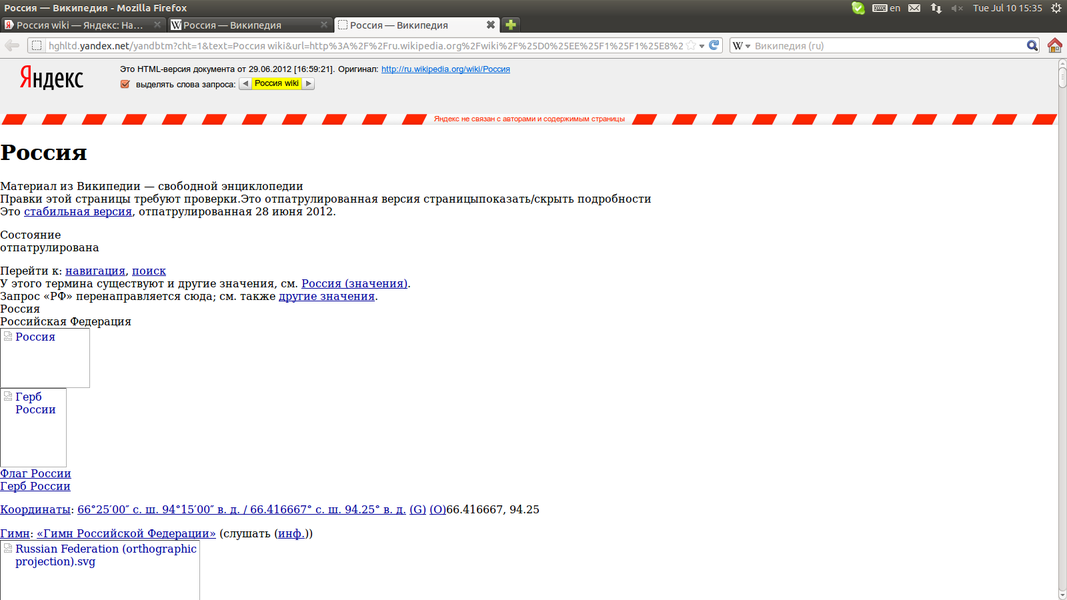
- Яндекс: введите любой запрос и слово “wiki”, нажмите на ссылку “копия”, после этого на кнопку “текстовая копия”.
- Google: введите любой запрос и слово “wiki”, нажмите на ссылку “сохранённая копия”, после этого на кнопку “текстовая версия”.
Русификация OSQA
- Скачать нормальный русский перевод здесь
- Открыть файл django.po Заменить все значения /bht/ на /default/ (/Название темы/ )
- Заменить файлы django.mo django.po на скачанные /osqa-server/locale/ru/LC_MESSAGES
- В файле settings_local.py следующая настройка LANGUAGE_CODE = ‘ru’
- Выполнить команду sudo django-admin.py makemessages -l ru -e html,txt -e xml
(Может потребоваться sudo apt-get install gettext)
- Перезагрузить Апач sudo /etc/init.d/apache2 restart
Мой форк перевода OSQA: у меня на Github.
Yota в MeeGo Linux 1.2 Original
При установке MeeGo от LinuxCenter Yota работает сразу же. Но что делать тем, кто ставил оригинальную ОС с сайта MeeGo? Скачав MeeGo 1.2 для Cedar Trail с официального сайта, я принялся за настройку моего брелка Yota SWC-U200.
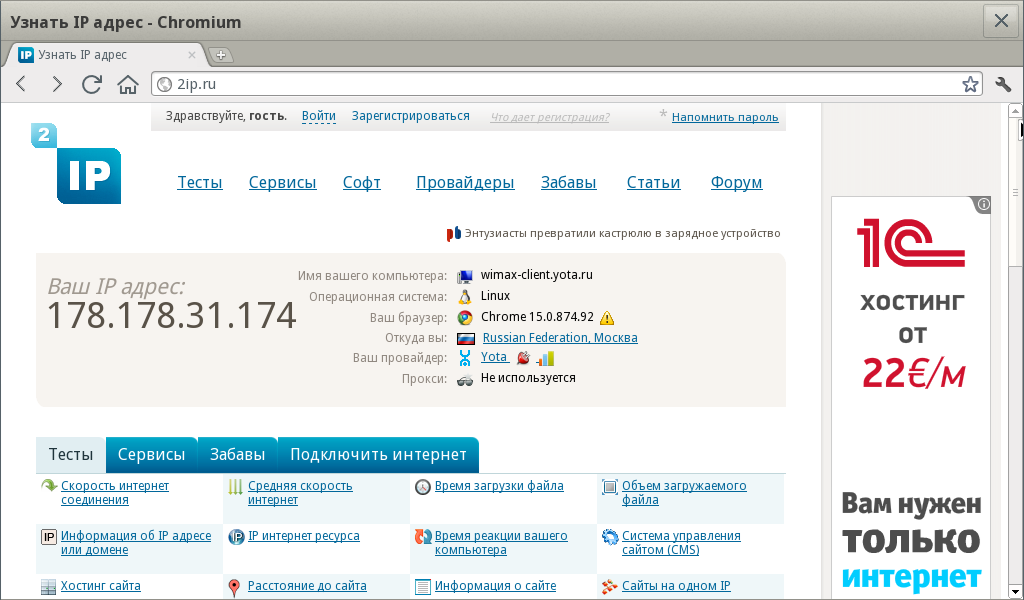
Для работы Yota под Linux необходимо установить пакет madwimax, которого нет в репах по умолчанию. Madwimax имеет зависимость dhclient, которого тоже нет в репах.
Сначала подключил репы Linuxcenter (спасибо Якову Мироничеву за полезный пост). Репы 1.1 катят для 1.2:
sudo zypper addrepo http://meego.linuxcenter.ru/MeeGo/releases/1.1/core/repos/ia32/packages/ "linuxcenter"
Затем их обновил:
sudo zypper refresh
Поставил dhclient:
sudo zypper install dhclient
Качнул madwimax у Mezon и запустил:
cd ~/Downloads
wget http://meego.linuxcenter.ru/Mezon/builds/trunk/daily/core/repos/ia32/packages/i586/madwimax-0.1.1-2.mezon.1.0.i586.rpm
sudo rpm -i madwimax-0.1.1-2.mezon.1.0.i586.rpm
sudo madwimax
Проверил, в ifconfig появился новый интерфейс, а MeeGo сообщил, что я успешно подсоединился к Wired Network. Проверил IP (2ip.ru), действительно, Yota 🙂
На всякий случай кидаю сюда RPM:
dhclient-4.0.1p1-6.10.i586.rpm
madwimax-0.1.1-2.mezon.1.0.i586.rpm
Разделение страниц пополам +crop-rotate с помощью ImageMagick
Bash script:
#!/bin/bash
#sudo apt-get install imagemagick
for i in {0..31};
  do convert -rotate 180 -crop '3262x2330+192+72' img-$i.jpg jpg:- | \
  convert -crop '50x100%' jpg:- imgout-$i%d.jpg; \
  rm img-$i.jpg; \
done
Bulk ffmpeg encoding
Code:
find . -name '*.AVI' -exec ffmpeg -i {} -b 1600k {}.mpeg \;
Using ffmpeg to encode video for my Android phone:
find . -iname "*" -exec ffmpeg -i {} -s 480x320 -vcodec mpeg4 \
  -acodec aac -ac 1 -ar 16000 -r 13 -ab 32000 -aspect 3:2 \
  -strict experimental {}.mp4 \;
Explanation:
find command searches for all files with AVI extention and for each of them executes command after —exec switch (which is ffmpeg -i input file -b bit rate). Curly brackets stand for currently found file.
SSH through HTTP proxy
This article explains how to connect to a ssh server located on the internet from a local network protected by a firewall through a HTTPS proxy.
Requirement are :
-
Your firewall has to allow HTTPS connections through a proxy
-
You need to have root access to the server where ssh is listening
Configure the ssh server
The ssh daemon need to listen on 443 port. To accomplish this, just edit this file (on debian system) /etc/ssh/sshd_config and add this line :
Port 443
Then restart the daemon :
sudo /etc/init.d/ssh restart
Configure the client
I suppose you are on a Linux system (debian for example). First you have to compile the connect binary which will help your ssh client to use proxies (HTTPS in our case). Then you have to configure your ssh client to tell him to use HTTPS proxy when he tries to connect to your ssh server.
-
Install the
connectsoftware :-
On debian system, just install the
connect-proxypackage :sudo apt-get install connect-proxy
-
On other Linux systems, you have to compile it :
cd /tmp/
wget http://www.meadowy.org/~gotoh/ssh/connect.c
gcc connect.c -o connect
sudo cp connect /usr/local/bin/ ; chmod +x /usr/local/bin/connect
-
-
Configure your ssh client. Open or create your
~/.ssh/configfile and add these lines :## Outside of the firewall, with HTTPS proxy Host my-ssh-server-host.net ProxyCommand connect -H proxy.free.fr:3128 %h 443 ## Inside the firewall (do not use proxy) Host * ProxyCommand connect %h %p
-
Then pray and test the connection :
ssh my-ssh-server-host.net
SSH to another server through the tunnel
For example to connect to in ssh github.com :
Host github.com
  ProxyCommand=ssh my-ssh-server-host.net "/bin/nc -w1 %h %p"
Credits: zeitoun.net
Convert Video to HTML5 in Ubuntu
I wanted an easy way to convert videos to HTML5 formats (mp4/ogg/webm). With Linux, I could easily create a bash script to do all three and even create a screencap for the poster attribute.
The install process is a bit tedious and time consuming, but after it’s all installed you’re good to run the script for all your videos. The script uses ffmpeg to convert to all 3 formats, and it supports most any video format. The script also uses ffmpeg to generate a random screenshot, and even writes the HTML5 code for you.
Installation
For the most part, this portion of the tutorial was derived from the Ubuntu Forums.
- Uninstall Old Versions
- Install Dependencies and Install Tools
- Install Yasm
- Install x264
- Install LAME
- Install libvpx
- Install ffmpeg
sudo apt-get remove ffmpeg x264 libx264-dev yasm
sudo apt-get update
sudo apt-get install build-essential git-core checkinstall texi2html libfaac-dev \
    libopencore-amrnb-dev libopencore-amrwb-dev libsdl1.2-dev libtheora-dev \
    libvorbis-dev libx11-dev libxfixes-dev zlib1g-dev
cd ~/Downloads
wget http://www.tortall.net/projects/yasm/releases/yasm-1.2.0.tar.gz
tar xzvf yasm-1.2.0.tar.gz
cd yasm-1.2.0
./configure
make
sudo checkinstall --pkgname=yasm --pkgversion="1.2.0" --backup=no --deldoc=yes --default
cd ~/Downloads
git clone git://git.videolan.org/x264
cd x264
./configure --enable-static
make
sudo mkdir /usr/local/lib/pkgconfig
sudo checkinstall --pkgname=x264 --default --pkgversion="3:$(./version.sh | \
    awk -F'[" ]' '/POINT/{print $4"+git"$5}')" --backup=no --deldoc=yes
sudo apt-get remove libmp3lame-dev
sudo apt-get install nasm
cd ~/Downloads
wget http://downloads.sourceforge.net/project/lame/lame/3.99/lame-3.99.tar.gz
tar xzvf lame-3.99.tar.gz
cd lame-3.99
./configure --enable-nasm --disable-shared
make
sudo mkdir /usr/local/share/doc
sudo mkdir /usr/local/share/doc/lame
sudo checkinstall --pkgname=lame-ffmpeg --pkgversion="3.99" --backup=no --default \
    --deldoc=yes
cd ~/Downloads
git clone http://git.chromium.org/webm/libvpx.git
cd libvpx
./configure
make
sudo checkinstall --pkgname=libvpx --pkgversion="$(date +%Y%m%d%H%M)-git" --backup=no \
    --default --deldoc=yes
cd ~/Downloads
git clone --depth 1 git://source.ffmpeg.org/ffmpeg
cd ffmpeg
./configure --enable-gpl --enable-libfaac --enable-libmp3lame --enable-libopencore-amrnb \
    --enable-libopencore-amrwb --enable-libtheora --enable-libvorbis --enable-libvpx \
    --enable-libx264 --enable-nonfree --enable-postproc --enable-version3 --enable-x11grab
make
sudo checkinstall --pkgname=ffmpeg --pkgversion="$(date +%Y%m%d%H%M)-git" --backup=no \
    --deldoc=yes --default
The part that will take the longest is the ffmpeg, so be prepared to wait.
The Script
Usage:
./convertHTML5 video-file.ext
The script will output “video-file.ogv”, “video-file.webm”, “video-file.mp4″, and “video-file.html” while keeping the original video intact. The HTML document just has the plain <video> code with nothing else, easily copied and pasted.
#!/bin/bash
if [[ $1 ]]
then
filename=$(basename "$1")
filename=${filename%.*}
directory=$(dirname "$1")
duration=$(ffmpeg -i "$1" 2>&1 | grep Duration | awk '{print $2}' | tr -d ,)
minutes=${duration%:*}
hours=${minutes%:*}
minutes=${minutes##*:}
seconds=${duration##*:}
seconds=${seconds%.*}
hours=$((hours*3600))
minutes=$((minutes*60))
total=$(expr $hours + $minutes + $seconds)
number=$RANDOM
let "number %= $total"
echo "Generating thumbnail"
ffmpeg -i "$1" -deinterlace -an -ss $number -t 00:00:01 -r 1 -y -vcodec mjpeg -f mjpeg "$directory/$filename.jpg" 2>&1
echo "Converting $filename to ogv"
ffmpeg -i "$1" -acodec libvorbis -ac 2 -ab 96k -ar 44100 -b 345k "$directory/$filename.ogv"
echo "Finished ogv"
echo "Converting $filename to webm"
ffmpeg -i "$1" -acodec libvorbis -ac 2 -ab 96k -ar 44100 -b 345k "$directory/$filename.webm"
echo "Finished webm"
echo "Converting $filename to h264"
ffmpeg -i "$1" -acodec libfaac -ab 96k -vcodec libx264 -level 21 -refs 2 -b 345k -bt 345k -threads 0 "$directory/$filename.mp4"
echo "Finished h264"
echo "Writing HTML..."
echo "</pre>
<video width="320" height="240" controls="controls" poster="\"$filename.jpg\"" preload=""><source src="\"$filename.ogv\"" type="\"video/ogg\"" /><source src="\"$filename.webm\"" type="\"video/webm\"" /><source src="\"$filename.mp4\"" type="\"video/mp4\"" />" > "$directory/$filename.html"
echo " " >> "$directory/$filename.html"
echo " " >> "$directory/$filename.html"
echo " " >> "$directory/$filename.html"
echo " Sorry, your browser does not support HTML5 video" >> "$directory/$filename.html"
echo "</video>
<pre>" >> "$directory/$filename.html"
echo "All Done!"
else
echo "Usage: [filename]"
fi
Credits: McSwindler